I usually love thinking about the history of the old pieces of iron that I run across – where they have been, how they have been used, and who used them. The history of this particular piece, however, was not quite as charming for me to ponder.
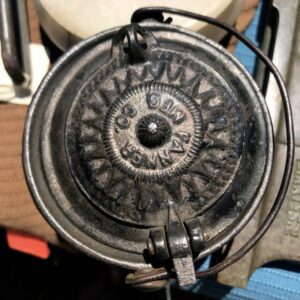
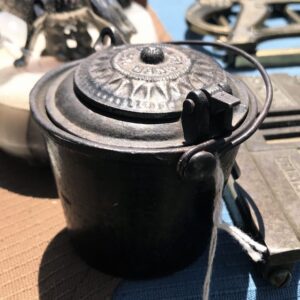
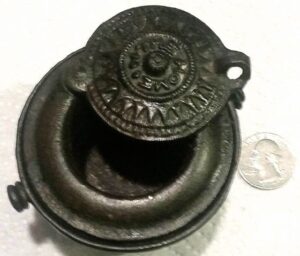
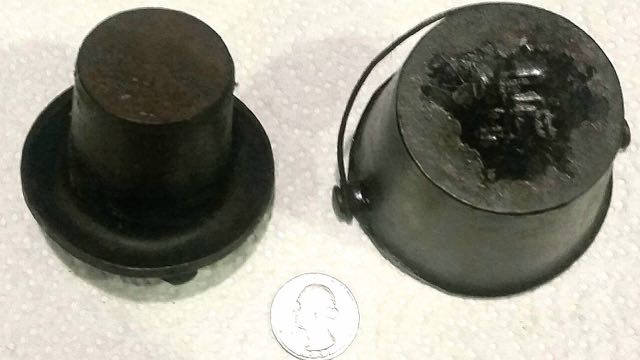
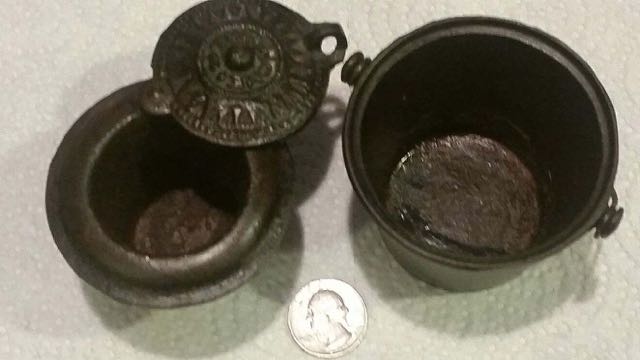
I ran across a pretty little cast iron pot with a lid and interior removable cup at a flea market. I seemed to recall that it was a glue pot. I’ve never had an interest in glue pots, but for some reason, this one captured my attention. It was pretty. I took a few photos and sent them to my cast iron collector friend Russ Howser. I knew Russ had an interest in small pieces, so I figured he could shed some light on the origin of the pot for me. Indeed, he did.
Fanner Glue Pot
What is a Glue Pot?
Well, melting chunks of animal glue into a liquid form so that it could be used.
Glue used to be made from the hides and bones of animals. Ever heard of “the glue factory?” They really existed. The white and yellow glues, epoxies, and cements that we typically see today came into commerce in around the 1950s; after World War II. Prior, animal hide glue was the glue of choice.
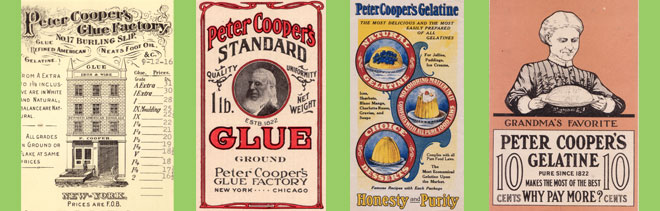
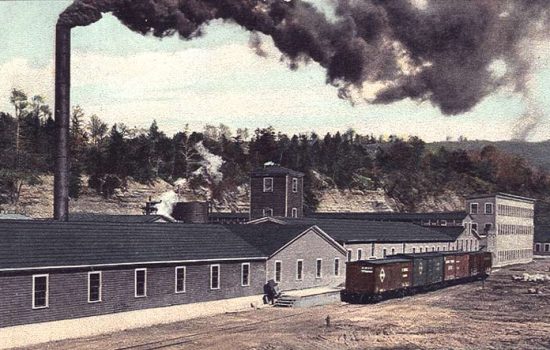
“In 1899, the Milwaukee tanning industry established the U.S. Glue Company factory in Carrollville [Wisconsin] to make glue from remnants and scraps of animal hides, both tanned and untanned. During the 1930s, the U.S. Glue Company sold the factory to the Peter Cooper Corporation, who then sold the factory in 1976 to the French pharmaceutical company Rousselot. Manufacturing of glue continued at the factory until it closed in 1985.”
See 2008 Health Consultation, FORMER PETER COOPER AND HYNITE PROPERTIES
CITY OF OAK CREEK, MILWAUKEE COUNTY, WISCONSIN, by U.S. DEPARTMENT OF HEALTH AND HUMAN SERVICES
Public Health Service Agency for Toxic Substances and Disease Registry
Division of Health Assessment and Consultation.
A succinct study of the Peter Cooper Corporation – and the massive harm caused to the environment by the glue factories, can be found online.
Hide glue is still used for certain purposes, such as bookbinding, piano work, repair of old furniture, and in some instances, by artists using rabbit glue to size their canvas. Hot hide glue has a fast bond time, does not creep, brings joints together as it dries, and can later be removed if necessary. Rabbit glue causes a greater shrinkage to the artist’s canvas than does gesso, hence a tighter frame. You can find rabbit glue to this day at art shops, woodworking shops, and at Amazon.
A fairly comprehensive synopsis of how hide glue is made, and old glue pots, can be found online in a blog post by the Martin Shepherd Piano Service. You can also read in more detail about how hide glue is made, here.
“On the Making of Animal Collagen Glue–When you wish to make some glue, do thus: take some limed skins, and put them into lukewarm water to soak right through; wash and clean all the flesh tissue and dirt off them, and put them in to clean water in a copper vessel to boil. Watch for when they come to the boil and begin to thicken, and strain off either with a woven strainer or a cloth, otherwise they will burn, and then put in more water; repeat this two or three times, straining off until they are completely dissolved. If you cannot find limed skins, use unlimed ones, choosing the skin from the feet or ears of oxen, and any skins that cannot be put to any other use or are of little value. If they are thick it does not matter; buffaloes and ewes are also good. Deal with them thus: take some quick-lime and put it into a pestle with some water and mix it until it is all dissolved; put the skins in this solution and leave them for a week, until every single hair has come off them. Take them out, wash and clean them thoroughly and let them dry. Whenever you want to make glue, do as we have written above for you. But if you are in a hurry and have no lime, in order to soften the unlimed skins soak them and then put them on to boil for a short time; take them out and clean them well of any fat and flesh tissues and cut them up in a chopper so that they will be boiled more quickly; do not separate the pieces completely, but leave them joined together so that you will not be hindered when you come to strain them off. Boiling the skins like this you will obtain some glue. If you want to dry the glue, put the last of the glue alone on a low fire and let it boil until it coagulates, only watch it well as it may froth up a lot, and you must therefore be present when it is boiling so that when it froths up you can take it off the fire and put it in a vessel of cold water so that it touches the bottom in order to stop it rising. Put it back several times on to the fire until coagulates, and then take it off and leave it to cool. Stretch a piece of string in a bow-saw, cut them into small pieces and leave them on a board for two or three days until they begin to harden; then pass string through them and hang them up in the air to dry completely, and keep them for when you want to lay gesso. See that you always prepare glue in cold weather, as it smells if the weather is hot, and you will not make such good progress.” (Dionysius, 1734)”
As quoted in “Glue Pots” by Martin Shepherd Piano Service.
As for the “modern” method to make hide glue:
“This method [Dionysiyus’] of preparing glue was used up to the beginning of the 19th century, and in some places even later. Since that time, glue has been produced industrially.
The modern glue manufacturing process basically follows this procedure:
- Wash hides and bones to remove dirt;
- Soak in limewater for 60 to 90 days;
- Wash to remove hair and lime;
- Neutralize with acid, drain, wash and drain again;
- Add the raw material to water, heat to 45-50° C. (110-120° F.) for two to four hours (called an extraction);
- Drain off the dilute glue solution, evaporate, chill, dry and grind the resulting solids;
- Repeat the last two steps three to four times to extract all of the glue from the hides and bones with the temperature increased (20-25° F.) each time.
It is not worthwhile for an artist to try making glue using ancient techniques, such as the method described by Dionysius. The quality of this glue will be considerably lower than the quality of glues prepared industrially and using inferior quality glue can create problems in the final product, such as scaling, formations of cracks, and the like.”
Id.
The Shepherd article shows a lovely assortment of old glue pots.
How glue pots were used
Iron glue pots worked well for melting the pieces of animal hide glue, as iron of course retains its heat well. Hide glue chunks need to be melted at about 140-45 degrees. Once the liquified glue is removed from a heat source, the glue sets very quickly.
The outer container of the glue pot was partially filled with water. Glue pellets and/or strips/pieces were placed into the interior pot, and the interior pot placed within the larger pot. The pots were then placed on a heat source – I imagine a wood or coal oven with the stove eye cover still intact. The water would heat around the inner pot – somewhat akin to a double-boiler – and melt the glue. Because the inner pot would be kept within the hot water surround, which would be kept hot by the cast iron, the pot could be brought to where it was needed – i.e. a table that needed a repair – as opposed to bringing the table to the glue pot on the stove.
Not something I want around the house
Despite my appreciation for the beauty of these small pieces, and thoughts of how they could be used to store small things around the house (paper clips or coins, anyone?), I don’t think I’ll be hunting for one to sit and gaze at and think about where it has been and how it was used.
Thanks to Russ Howser for the background and the photos!
(A version of this article was drafted but not published in 2018).